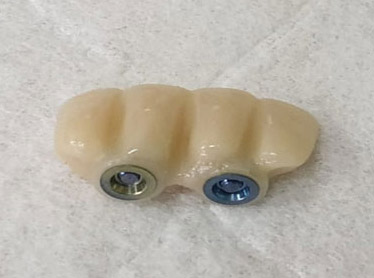
After the implantation process the patient received her first temporary restoration to try and see how the adaptation process undergoes and if some changes needed. Sometime after the patient came back because the temporary bridge cracked between teeth 12-13. although it was explained to the patient not to apply localized excessive forces, it turned out as a hard thing to do. The love for sunflower seeds could not be easily beaten.
From the anatomic standpoint – two implants (12 and 13) were proximally implanted, tooth no. 12 is small in its volume and the Multi-unit sleeve and screw channel weakened it further more. Thus when the patient bit the sunflower seed, the localization of the force had broken the bridge. To bypass this problem the 3mm Sleeve that was used was changed to 1.5mm and the screw channel was eliminated.
The sleeve that was placed in bridge in place of tooth no. 12 now acts as a stopper. The stopper doesn’t have a screw channel and it cannot be screwed to the Multi-unit, it sustains vertical forces nonetheless. Undercuts were made with a conical burr in the bridge for the cementation process of the sleeve. The small undercuts increase the retention of the cementation procedure. Using a 1.5mm sleeve as a stopper can be for aesthetic reasons as well as for strengthening the bridge.
Tip: it is easier to make cuts in zircon before Sintering while the material is still soft.
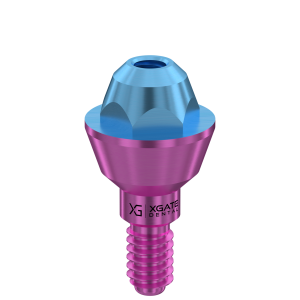
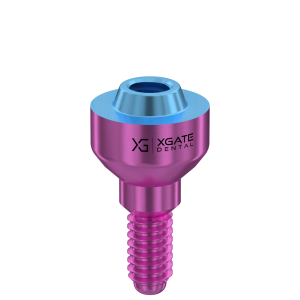
The V-Type Multi-unit system comes with a verity of sleeves – from the extra smallest for the most extreme cases to a large one for best cementation – 1.5mm, 3.0mm, 4.0mm, 6.0mm. All of the sleeves are color coded by height, making the work with them much easier and helping identifying the sleeves. In order to get the best results in this case the smallest 1.5mm sleeve for the V-type Multi-unit system was used
Patient in his forties, with worn teeth. A restoration of the two frontal teeth on Multi-units was chosen to be done. There is a lack of interocclusal space due to the teeth wear. Even when using the lowest height of Multi-unit we still only have 3.5mm for the restoration.
The V-Type Multi-unit system comes with a verity of sleeves – from the extra smallest for the most extreme cases to a large one for best cementation – 1.5mm, 3.0mm, 4.0mm, 6.0mm. All of the sleeves are color coded by height, making the work with them much easier and helping identifying the sleeves. In this case a 3mm sleeve for the V-type Multi-unit system was used due to lack of space.
The bridge was made using the smallest Multi-unit available (0.5mm) and with a shortened sleeve 3.0mm. A screw retained restoration that is only possible to make using the X-Gate type Multi-unit system.
The bridge was made using the smallest available Multi-unit (0.5 mm) and a reduced 3.0 mm sleeve. It is a screw-retained restoration that can only be performed using the X-Gate Multi-unit system.
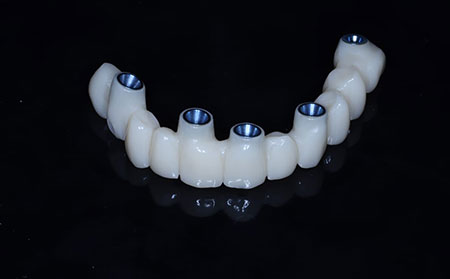
Ti-base supported Maryland temporary restoration and Multi-unit restoration
Clinical Case
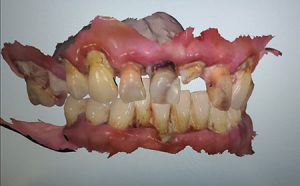
Patient age 74, four frontal teeth with calculus, movement and pockets. The teeth need to be extracted.
As shown in the image above, the patient also has 2 crowns on implants.
A Maryland bridge fixed to implants with Ti-Bases was made from PMMA prior to the extractions.
The Ti-Base serves as a connector between the implant and the restoration, enabling the highest customizable solutions using CAM\CAD, with best results and highest precision.
The teeth were extracted, two implants were placed in the place of the extracted teeth.
After the implant placement A Maryland bridge was fixed to the posterior implants.
The bridge was polished and adjusted.
After six months the Maryland bridge was removed and the healing caps were reviled.
The healing caps were removed and the height of the gingiva was measured.
Two Multi-units were placed. They were chosen by the height of the gingiva.
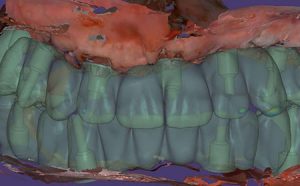
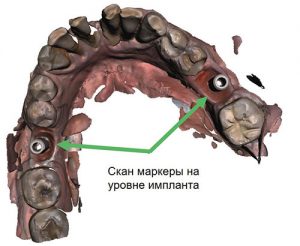
Scan abutments were placed on top of the multiunit and the implants.
Implant-level impression abutment vs Multi-unit-level impression abutment.
The old crowns of the molars were in good condition, so it was decided to reuse them instead of making new ones. For the anterior implants, a new PMMA bridge was made.
The old crowns and the new four-element PMMA bridge have been inserted into the patient’s mouth.
The old Maryland bridge after 6 months in the mouth.
Products used for this case study:
Ti-Base, monolith direct
Kit Abutment Multi-unit Straight V-type con sleeve da 3.0 mm
Scanbody MUA V-type
Ti-Base, monolithic direct, rotational
Ti-Base, monolithic direct, rotational
Multi-unit Straight V-type abutment kit with 4.0 mm sleeve
The patient, in his fifties, had lost his teeth. Immediately after the extraction, implants were placed and different Multi-unit systems were chosen. The Multi-unit systems were chosen so that the screw channels were parallel and in an occlusal direction. The angled Multi-unit has a support that helps to predict the angle of the future screw channel.
Immediately after the assembly of the Multi-units, the scan bodies were mounted on the Multi-units.
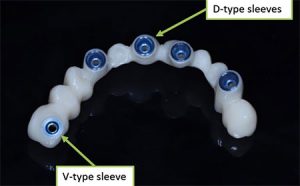
For straight Multi-units, V-Type Multi-units were chosen, while for angled ones, D-Type were used.
The V-Type has a smaller cone and the hexagon is inside the Multi-unit, a more suitable option when there is not enough interocclusal space and gives more thickness to the zirconia, thus reinforcing the crown.
The D-Type has a larger cone and an angled version that has the same sleeve.
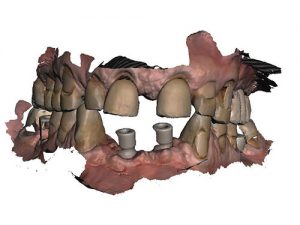
After taking the impression, a bridge was modeled using Exocad software.
Conclusions
A provisional bridge made of PMMA was created. Different sleeves were cemented for both the V-type and D-type.
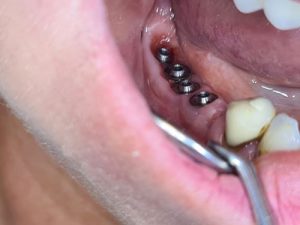
The patient, in her forties, complained of bad breath.
Teeth 32, 31, 41 and 42 presented with periodontitis with deep pockets and mobility, which required extractions, hence the choice of immediate loading.
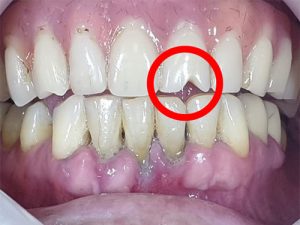
In addition, tooth 21 in the upper arch was visibly worn, as was the proximal-incisal area between teeth 32 and 31, typical signs of a passionate fondness for hard foods to grind, such as sunflower seeds, roasted corn, etc…
Extraction, implant procedure and selection of the most suitable multi-unit for the case.
Assembly of the immediate load provisional bridge. Once the healing process is complete, the gums usually take the shape of the provisional bridge, if it is properly executed. Therefore, after this period, it is usually not necessary to modify anything and it is much simpler to proceed to the next step. Since immediate load was chosen, the crowns are not in occlusion, in order to reduce the pressure on the implants.
When performing immediate load and in the presence of specific dietary habits, doctors must adequately inform patients.
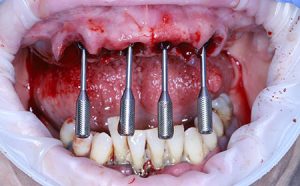
A patient in their fifties lost all their upper teeth due to poor dental hygiene over a long period of time. The patient came in after their tooth number 21 (8) broke and fell out. In the first phase, the upper arch was restored – extractions were performed on the upper arch, implants were placed, and the most suitable multi-units were chosen. For the anterior area, four angled multi-units were selected. As can be seen, the screw channels are parallel and oriented on the occlusal plane after correction. The support of the multi-unit helps predict the angle of the future screw channel. Each angled multi-unit is equipped with such a support.
Parallel positioning of the screw channel after angle correction.
Insertion of the scanbody and impression taking.
Evaluation
The V-type has a smaller cone and the hexagon is inside the multi-unit, which is a more suitable option when there is not enough interocclusal space and gives more thickness to the zirconia, thus reinforcing the crown. The D-type has a larger cone and an angled version with the same sleeve.
To determine the VDO (Vertical Dimension of Occlusion) for the patient, impressions were taken twice: the first time before extractions and the second time with the impression abutments. The second impression was placed on top of the first one.
A provisional PMMA bridge was designed and made. The different sleeves were cemented for both V-type and D-type.
Use of an incorrectly placed implant by using Multi-Unit V-Type and 1.5mm sleeve
Clinical Case
Patient in his 80‘s came with broken teeth and a broken composite bridge, the bridge changed color over the years where the hole was. The lower bridge was also replaced, functionality was more important than aesthetics. Bite lifting was also performed.
Jaws without the broken bridge.
The old Multi-units were replaced by new Multi-units with different heights.
The jaws were scanned via intraoral scanner.
The new temporary bridge with the new sleeves.
Analysis
Angulated Multi-unit will not fit because the implant is outdated, the options were either to remove the implant a long process with a complex restoration or to work in the method we did. due to age restrictions the options vary.
Solution
The V-Type Multi-unit system comes with a verity of sleeves – from the extra smallest for the most extreme cases to a large one for best cementation – 1.5mm, 3.0mm, 4.0mm, 6.0mm. All of the sleeves are color coded by height, making the work with them much easier and helping identifying the sleeves.
In order to get the best results in this case the smallest 1.5mm sleeve for the V-type Multi-unit system was used.
The lower incisors need to be removed, teeth 31, 32, 41 and 42 are mobile. Immediate load implant is not recommended, problems with temporary prostheses are expected. On teeth 36 and 46, single crowns with screw fixation were placed.
First Phase
In the first phase, the crowns of teeth 36 and 46 were unscrewed to be repositioned after the end of the treatment.
Second Phase
The second phase consists of installing a scanbody on the previously installed implants of the patient and taking impressions (the impression can be taken with the transfer) of the arch to create a provisional bridge supported by 2 implants, taking into account the removal of the lower incisors.
Third Phase
The third phase is the fixation phase.
Evaluation
Here is the result after removing 4 incisors and installing a temporary bridge.
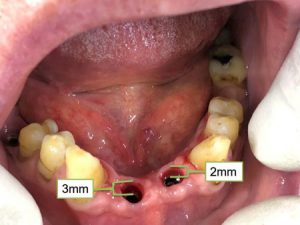
After the installation of implants at positions 31 and 42, the height of the gums is 3 mm and 2 mm.
Fourth phase
During the fourth phase, the appropriate multi-units were inserted for the case. The color of the XGate multi-unit system cone indicates its height.
Here’s how the gums appear after osseointegration with shapers installed on the multi-units.
Fifth phase
The fifth phase involves creating a permanent bridge, removing the healing screws, and installing Scanbodies on implants and Multi-Unit sleeves to take impressions (or taking impressions through transfers).
Here is the new temporary bridge on the incisors with the fixed sleeve.
Sixth phase
In the sixth phase, the old crowns on the molars were restored to their original position before the start of the treatment.
New Bridge made easy thanks to the screw retained system
Clinical case
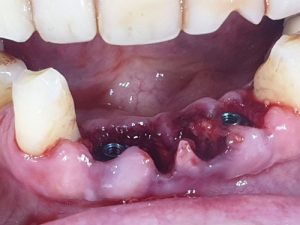
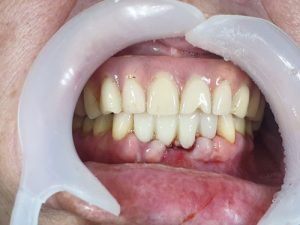
Patient, female 63 years old, tooth 45 requires extraction and a crown replacement, there is a bridge on four screw-retained implants (on teeth 48-47-46). Patient’s main complaint was that food gets stuck around the crowns. After extraction of tooth 45, the 4 Multi-units were changed to the smallest height available (0.5mm). Instead of the old 4-unit bridge, a 5-unit bridge with a single cantilever crown was made. The new bridge is more convenient than the old one. The crowns are at the gingiva height. No additional surgery was required to install the implant.
The gingiva after the extraction of the broken tooth and the removal of the old bridge. Since the old prosthetic bridge was screw retained, the process is simple and less traumatic for the patient.
The old bridge was easily removed, the multi unit abutments were replaced and an impression was taken.
Evalutation
The new designed bridge is longer(*by a single cantilever crown) and is based on the same 4 implants as the previous one. The doctor avoided a complex bone augmentation procedure. This case shows how fast and comfortable the restoration process can be done thanks to the screw retained system.